Managing table and view schemas in databases with traceability (version control) and reliability is a problem that many tools have tried to solve over the years. In the world of software development, the most common approach today is to use some kind of ORM (Object-Relational Mapping), which maps data structures in your code (usually classes) to tables in the database.
Some famous examples are: Entity Framework in C#, SQLAlchemy in Python, and Prisma in Node.js.
However in the data science world we don’t yet have a defined standard for how to approach this problem. This is due to several factors, the main one being that using a traditional ORM generally doesn’t make much sense as it can be limiting in some cases, not giving “full freedom” when modifying data structures (views especially) and also optimizations (mainly in OLAP databases).
One of the tools that aims to solve this problem and has been gaining a lot of traction recently is our beloved DBT. It is truly an incredible tool with great potential, but as our friend Benn Stancil said in a recent article:
“Orchestration tools like Dagster outperform dbt with development environments explicitly built to create multi-source, multi-destination, polyglot data pipelines. They were able to copy the beloved parts of dbt Core faster than dbt Labs was able to add dynamic programming, robust Python support, and other elements people wanted in their transformation layer.” Benn Stancil, How dbt fails
I must say I agree 100% with everything Benn said, and that’s why I decided to show how I use Dagster in my day-to-day to manage these structures in my databases.
Preparing Our Environment
Creating a Postgres Database
We’ll use neon.tech for hosting a Postgres database. Neon offers an incredible Serverless hosting service with a great free plan.
After creating the database (I won’t go into details as it’s super intuitive and simple), we’ll load a product sales dataset to run our tests. You can find it at this link: relational.fit.cvut.cz/dataset/SalesDB.
Below is the table schema for this dataset.
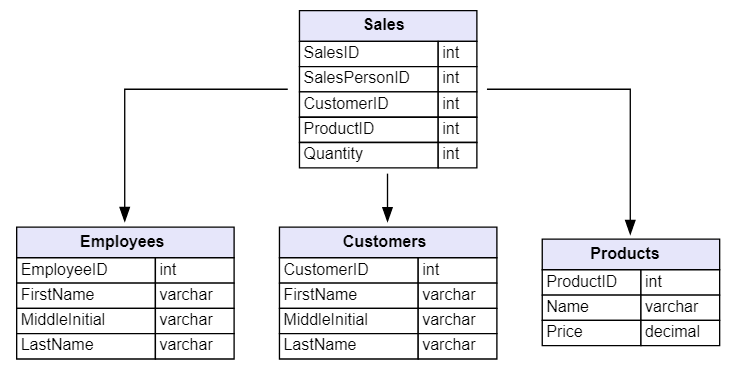
Note: I changed the original dataset field names from Camel case to Snake case.
Installing and Configuring Dagster
To keep the article concise I’ll only add the main parts of the code here. The complete code is available on my GitHub at this link.
First let’s define our database connection resource. We can define a resource in Dagster as an object that abstracts some external resource, such as a database connection (in this case) or an API.
Here’s the code for our resource:
|
|
Now let’s define our repository. It serves as a collection of assets, jobs, schedules, and sensors. They are a convenient way to organize your different jobs and other definitions in different repositories.
We’ll also create an asset reconciliation sensor, which is what will work the magic of automatically propagating our schema updates to dependent assets.
|
|
In lines 2 and 16 we are importing and adding our assets to the repository, respectively: we’ll define those assets below.
Creating Our First Asset in Dagster
First, let’s create the assets containing the DDL for creating our tables. We can do this as follows:
|
|
The content of the “sql/ddl.sql” file is:
|
|
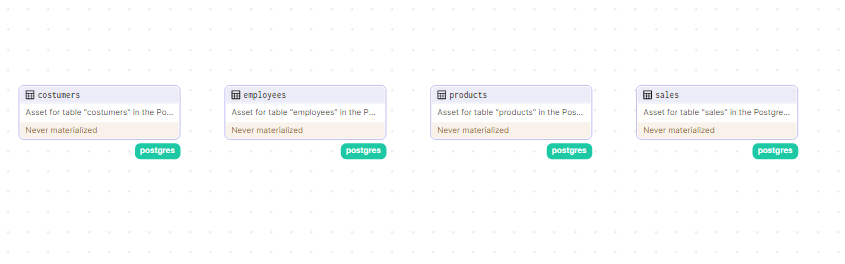
After repeating the process for the other tables (you can find the complete code on my GitHub), let’s now assign the necessary resources we defined when creating our assets — in this case our Postgres connection. We can do this as follows:
|
|
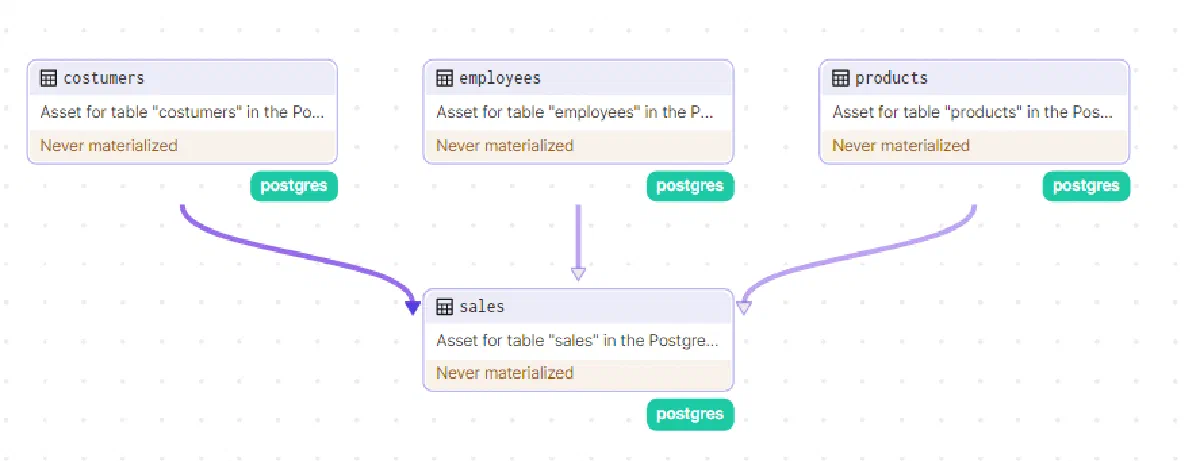
So far, we have the following assets in Dagster:
But if we tried to create our assets now, we’d have to manually create the tables in the correct order to avoid errors due to foreign keys. Let’s fix this by defining the dependencies on tables that have foreign keys — in this case the “sales” table — by adding the following code snippet to the asset definition:
|
|
Now we can materialize (run) our assets without worrying about dependencies between tables.

Below is a GIF of the asset materialization process so far:

After that, I loaded the data into the tables manually, but nothing would stop us from creating a Dagster job to do it automatically.
Creating Assets for Views
Our tables were modeled using Star Schema, where we have the dimension tables: “employees”, “products” and “costumers”, and the fact table: “sales”. However, let’s now create a view where we can get a denormalized view of the data. Here’s the query we’ll use to create that view.
|
|
The query above returns:

Now let’s define the asset to manage this view:
|
|
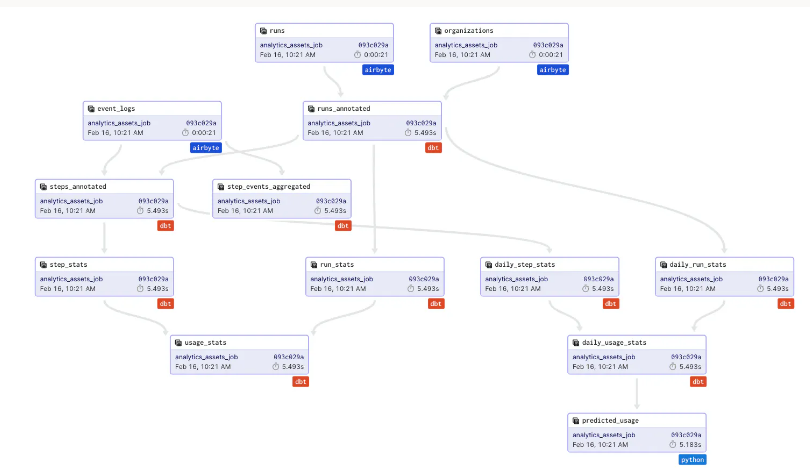
After defining this, here is our complete flow so far:
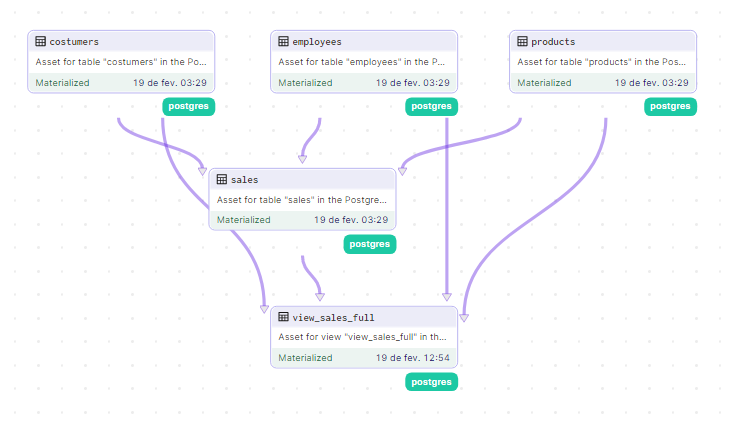
I believe you’ve understood the concept: there is no limit to how many views and dependent tables we can create from here.
Conclusion
Dagster is truly an incredible orchestration tool that brings sensational concepts like assets, being much more complex than what was shown here, including partitioning, internal DAGs for more complex assets, freshness policy and much more. For this and other reasons, I always choose to use it over more rigid tools such as Airflow.
Dagster VS DBT?
It’s worth remembering that despite the sensationalist title, you don’t have to choose between one tool or the other. One of Dagster’s great advantages is that its assets can literally be anything, including DBT models. Dagster has been widely used by the community as an orchestrator for DBT.
You can find more details in this article published by Dagster itself.
But tell me your opinion: if you had to choose between DBT and Dagster, which would you choose — or would you use both together? Leave your thoughts in the comments below!